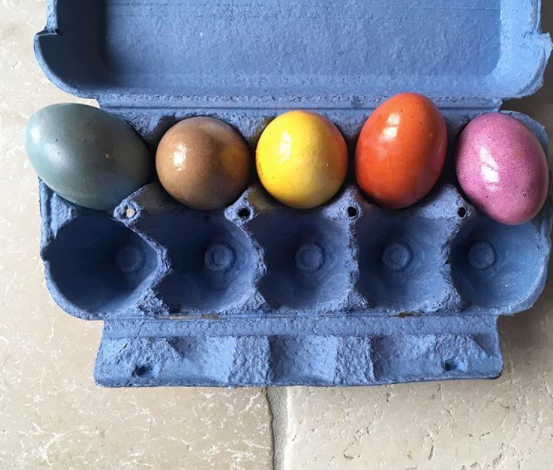
MAKE etc:. DIY Natural Easter Egg Dyes
By Chloë Stewart
First thing to note - and hopefully another reason why you'll love doing this as much as we do - most of these natural dye colours come from otherwise wasted, thrown out, kitchen ingredients.
Secondly, natural dyes take a lot longer to actually dye/taint the egg, than chemical dyes. So be patient. Normally, I'll leave 2 eggs in each jar/colour anywhere from 30 mins - 1 hour.
Tested on both brown and white eggs. First, hard boil your eggs. Only once the eggs are completely cool should you then dye them. If not too hot and humid, they can be left on your Easter/Spring table-scape until ready to eat; ours will normally last a few days on the table, but if you're worried/it's hotter where you are, they'll keep nicely in the fridge.
Once you go natural, you never go back.
Ingredients
1/2 litre Water
1-2 tbsp Vinegar [we have found ACV - Apple Cider Vinegar - works best]
Dye of choice:
- Outer Red Cabbage Leaves and / or Old-Looking Blueberries [that you might normally throw away] = blue
- Same as above + extra 1 tbsp ACV OR Mix Red Cabbage + Onion Skin OR Beetles [if you can get your hands on them] = purpley
- Turmeric + Red Cabbage = Green/Brown
- Ground [dried] Turmeric = yellow
- Yellow Onion Skin [that you might normally throw away] = orange/red
Method
Bring water and chosen natural dye to a quick, hard boil, then reduce to a gentle boil for 20 minutes [minimum] - water should reduce by half. Pour into your heat-proof dying jar, sieving out the dye-emitter [skins etc.] and allow to cool completely.
Once cooled and ready to dye, add 1 tbsp vinegar, give a quick stir, then pop your egg into the jar and make sure it is fully submerged. Leave egg until it has reached the desired colour.
Carefully remove with a [slotted] spoon, and place on a paper-towel lined baking tray. Allow to dry completely, before additional decoration/table-scaping/serving for lunch.


